MGMT Orthopedic Implants
After joint replacement, spinal fusion, or fracture fixation, everyday lifting can feel uncertain. A grocery bag, suitcase, or wet laundry basket may suddenly seem risky. The question is simple: “Can I lift heavy objects with orthopedic implants?” The safest answer depends on your implant, surgical site, healing stage, muscle strength, and medical history. No single weight limit applies to everyone. Your orthopedic surgeon or physical therapist should guide that decision.
Implants are designed to support movement, but they do not make healing immediate. Early loading may strain healing bone, repaired tissue, or surrounding muscles. Even years after surgery, poor technique can increase stress on your back, hips, knees, or shoulders. Keep the object close to your body. Bend through your hips and knees. Avoid twisting while lifting. Move slowly, and use a cart or another person when necessary.
Small details matter. A box may weigh twenty pounds, yet awkward handles can make it feel heavier. Stop if you notice sharp pain, new swelling, weakness, numbness, unusual clicking, or loss of stability. Seek professional advice promptly when symptoms persist or worsen. This guidance is intentionally cautious because recovery is rarely perfectly predictable. I once underestimated how quickly fatigue changes lifting form; that mistake deserves attention, not dismissal. A personalized assessment remains more reliable than online estimates, especially after recent surgery or when pain returns.
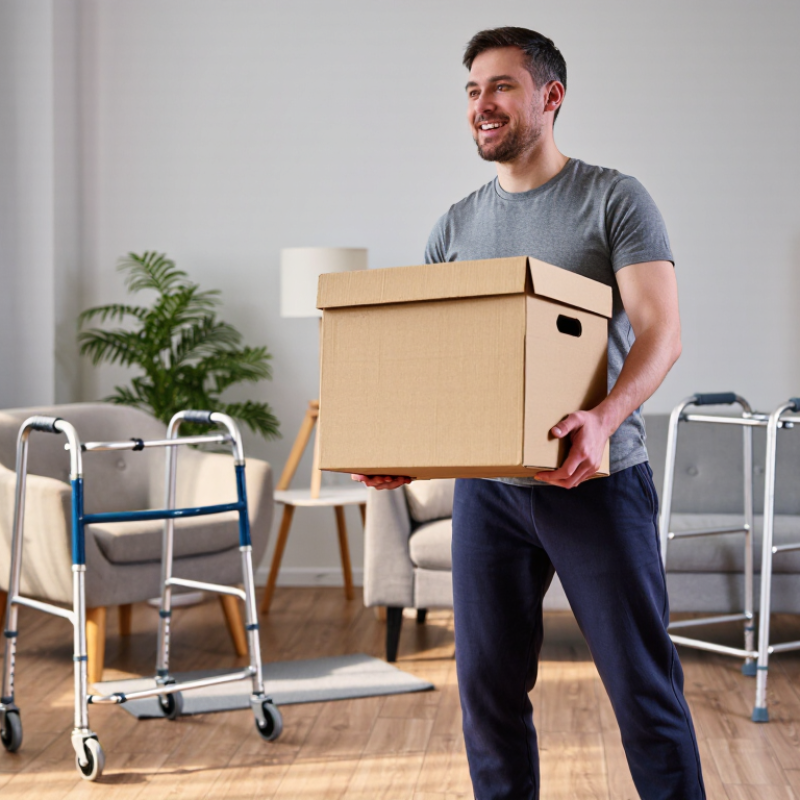
Before lifting a heavy object with an orthopedic implant, obtain medical clearance from your orthopedic surgeon. The implant’s location, surgical technique, and healing stage all affect your safe lifting limit. A hip replacement differs from a spinal fusion or shoulder repair. Do not rely on a general fitness assessment.
Your clinician may review recent X-rays, muscle strength, joint stability, and pain levels. They may also ask about diabetes, bone density, balance, and previous complications. Bring a real example, such as lifting a 20-kilogram box from floor level. Specific details help your clinician give practical advice. Ask whether physical therapy should come first. Small errors matter.
Clearance should include limits on weight, posture, repetition, and twisting. It may also specify when those limits can change. A clearance letter is not a permanent guarantee. Healing can slow, and symptoms can appear after an apparently easy task.
Stop if you notice sharp pain, new swelling, weakness, numbness, or a sudden change in movement. Contact your medical team promptly.
I would also admit one uncomfortable truth: people often test their limits too early, especially when they feel better. Feeling capable is useful, but it is not the same as being fully healed. Clearance must match the task, not just the calendar.
How to Safely Lift Heavy Objects With Orthopedic Implants?
An implant does not create one universal lifting limit. The safe load depends on implant location, fixation method, surgical approach, bone quality, healing stage, and muscle control. The 2024 National Joint Registry Annual Report recorded more than three million hip and knee replacement procedures in the United Kingdom. That large dataset also highlights a practical truth: outcomes vary between patients, so generic weight advice can mislead.
Ask your surgeon or physical therapist for an implant-specific limit. A 5-kilogram grocery bag may be acceptable after one procedure but unsuitable during early recovery after another. Follow the written restrictions, even when pain has improved. Pain can disappear before tissues regain strength. That is easy to underestimate.
Use both hands. Keep the object close to your waist. Bend through your hips and knees, then stand without twisting. Turn with your feet, not your spine. Avoid sudden lifts, uneven ground, and carrying loads up stairs alone. A small wheeled cart may reduce strain. Stop if you notice increasing pain, swelling, warmth, instability, or a new clicking sensation. Contact your clinical team promptly if these symptoms persist.
The American Academy of Orthopaedic Surgeons recommends individualized rehabilitation and gradual activity progression after joint replacement. I would also question “feeling strong” as a clearance test. Strength is only one part of implant protection; balance, coordination, and tissue healing matter too.
| Implant or Procedure Type | Typical Early-Phase Weight Guidance | Movements Commonly Limited | Safer Lifting Strategy | When to Seek Surgeon-Specific Clearance |
|---|---|---|---|---|
| Total Hip Replacement | There is no universal kilogram or pound limit. During early recovery, patients are commonly advised to avoid heavy or awkward loads and to increase activity gradually. | Depending on the surgical approach and surgeon instructions: deep hip flexion, crossing the legs, excessive twisting, or combined bending and rotation may be restricted temporarily. | Keep the object close to the body, use both hands, avoid pivoting on the operated leg, and turn with small steps instead of twisting. | Before lifting furniture, loaded luggage, heavy laundry baskets, or any object that causes limping, hip pain, or loss of balance. |
| Total or Partial Knee Replacement | Weight bearing is often progressed as tolerated when approved, but heavy carrying should be postponed until walking is stable and swelling is controlled. | Deep squatting, kneeling, repeated stair carrying, and twisting while the foot is planted may be uncomfortable or restricted during rehabilitation. | Lift from a raised surface when possible, keep the knee aligned with the toes, and avoid carrying loads while using a walker or cane unless instructed. | Before carrying loads that increase knee swelling, cause buckling, or require stairs, uneven ground, or prolonged standing. |
| Spinal Fusion or Other Spine Surgery | Many postoperative plans temporarily limit lifting to approximately 5–10 lb (2–4.5 kg), but the actual limit depends on the operation, healing, and surgeon’s protocol. | Bending, lifting, and twisting together are commonly restricted. Prolonged stooping, sudden pulling, and repeated overhead lifting may also be limited. | Use a hip-hinge technique, keep the spine neutral, hold the object close, and ask for help rather than twisting with a load. | Before exceeding the written lifting limit, returning to manual work, lifting overhead, or handling unpredictable loads. |
| Shoulder Replacement | The operated arm is usually protected early. Lifting restrictions can be strict, especially after a reverse shoulder replacement, and may range from no active lifting to very light loads. | Forceful pushing or pulling, reaching behind the back, sudden overhead movement, and unsupported arm elevation may be restricted. | Use the non-operated arm when possible, keep the operated elbow near the body, and do not use the arm to push up from a chair unless cleared. | Before carrying a child, suitcase, grocery bag, pet, or any load away from the body or above shoulder height. |
| Fracture Fixation With Plates, Screws, or Rods | The implant does not automatically mean full strength. Weight bearing or lifting may be non-weight-bearing, partial, or as tolerated until imaging confirms adequate bone healing. | Impact, jumping, twisting, climbing, or loading through the repaired limb may be restricted according to fracture location and healing progress. | Follow the prescribed weight-bearing status exactly; use crutches, a walker, or other equipment as directed and avoid testing the limb with heavy objects. | Before increasing load, stopping assistive devices, returning to sports, or lifting after a fracture that has not been confirmed as healed. |
| Ankle, Foot, or Lower-Limb Implant | Restrictions often focus on weight through the limb rather than the weight held in the hands. Non-weight-bearing or partial weight-bearing may be required for a defined period. | Walking on uneven surfaces, stair carrying, pivoting, and prolonged standing may be limited while balance and bone or soft-tissue healing recover. | Do not carry loads while using crutches unless specifically instructed. Keep one hand available for support and use a backpack only if approved and balanced. | Before carrying objects on stairs, walking without prescribed support, or progressing from partial to full weight bearing. |
| General Long-Term Implant Care | After healing, many people can return to everyday lifting, but repetitive high-impact activity, maximal lifting, and sudden load increases may increase stress on bone, soft tissue, or the implant. | Avoid combining heavy loads with twisting, rapid direction changes, unstable footing, or poor body mechanics. | Plan the lift, test the load, use a stable stance, bend through the hips and knees, keep the load close, lift smoothly, and stop if pain or instability develops. | Before beginning physically demanding work, strength training, contact sports, or any activity not covered by the rehabilitation plan. |
Heavy lifting with an orthopedic implant begins before you touch the object. Ask your surgeon or physical therapist about current weight limits, movement restrictions, and healing progress. Implant type, surgical site, bone quality, and recovery time all matter. Do not copy someone else’s lifting plan.
Prepare your body with five minutes of gentle walking and joint-approved mobility exercises. Stop if pain, swelling, numbness, or unusual weakness appears. Wear stable, closed shoes. Clear loose rugs, wet patches, pets, and clutter from the route.
Place the load between knee and chest height when possible. The NIOSH Revised Lifting Equation uses a 51-pound load constant only under ideal conditions; real-world limits become lower with twisting, distance, repetition, or poor grip. That number is not your personal allowance.
The World Health Organization reports that about 1.71 billion people live with musculoskeletal conditions, showing why careful movement planning matters.
Tips:
A second person helps, but coordination matters; agree on “lift” and “stop” first. I used to think a short carry was harmless. It was not.
If the object shifts, set it down safely instead of rescuing the lift. Persistent pain, warmth, drainage, or reduced function requires prompt medical advice.
Before lifting, confirm that your surgeon has cleared the activity. Healing time varies with the implant, surgery, and body region. A physical therapist can check your strength, balance, and movement pattern. Plan the route first. Remove loose rugs, open doors, and place the object on a stable surface.
Stand with your feet shoulder-width apart. Keep the load close to your body. Bend through your hips and knees, not your spine. Tighten your abdominal muscles gently, then rise with your legs. Breathe out during the effort. Keep it close. Avoid twisting while holding weight. Turn by moving your feet instead.
Use a cart or ask for help when the object feels awkward. Team lifting works best when one person gives clear commands. Start with a lighter load and test your control. Pain, sudden weakness, swelling, or unusual clicking requires stopping and contacting a healthcare professional. Do not push through sharp pain. A common mistake is lifting quickly because the object seems manageable. Slow movement reveals poor balance earlier. I would still question any fixed weight limit, because implant guidance differs between patients. Recheck your technique during daily tasks, such as lifting a laundry basket from the floor. Pause if unsure.
Lifting with an orthopedic implant requires patience, even when the incision looks healed. Use a stable stance, keep the object close, and avoid twisting while standing. A physical therapist can teach safer movement based on your implant, surgery, and recovery stage. Weight limits are personal. Do not copy another patient’s routine.
Stop immediately if you feel sharp pain, sudden pressure, or a catching sensation near the implant. New swelling, warmth, redness, drainage, or a wound opening also deserves medical advice. Watch for weakness, numbness, unusual tingling, or a joint that feels unstable. A popping sound followed by pain is not something to “test” again. Neither is pain that continues after rest, ice, or prescribed medication. Seek urgent care for severe pain, a visibly deformed joint, chest pain, breathing difficulty, or a painful calf with sudden swelling. These symptoms can signal complications, although only a clinician can diagnose them.
I have seen people mistake determination for safe progress. That judgment can fail after one awkward lift. Lower the object gently, sit down, and contact your surgeon or rehabilitation professional. Describe the object’s weight, your body position, and the exact symptom. Photos of swelling or drainage may help, but they do not replace an examination. When uncertain, pause.
NIOSH benchmark lifting limit as horizontal reach increases
The chart applies the NIOSH Revised Lifting Equation under ideal conditions, with the load held close to the body and no twisting, frequency, or coupling penalties. It is a general ergonomic benchmark, not a personalized lifting limit for people with orthopedic implants. Follow the restrictions provided by your surgeon or physical therapist.
Stop if you develop sudden or worsening joint pain, a popping sensation, new instability, unusual swelling, numbness, weakness, or a change in the shape or position of the operated area.
Contact your surgical team promptly for persistent or increasing pain, redness, warmth, drainage, fever, wound changes, or reduced function. Seek emergency care for chest pain, severe shortness of breath, fainting, or sudden one-sided leg swelling.
Reference: National Institute for Occupational Safety and Health, Revised NIOSH Lifting Equation. The 23 kg load constant is reduced as horizontal reach increases; orthopedic-implant restrictions vary by procedure and individual recovery.
No. Safe limits depend on implant location, fixation, bone quality, healing, and muscle control. Ask your surgeon or physical therapist.
Maybe, but not automatically. A five-kilogram bag may be acceptable later and unsafe during early recovery. Follow your written restrictions.
Use both hands. Keep the object close to your waist. Bend your hips and knees. Stand without twisting. Turn with your feet.
Walk gently for five minutes. Use approved mobility exercises. Wear stable, closed shoes. Clear rugs, wet spots, pets, and clutter.
No. General numbers assume ideal conditions. Twisting, distance, repetition, poor grip, and uneven ground reduce safe capacity.
No. Recovery differs between patients. Do not copy someone else’s limit. I once underestimated a short carry. That judgment can fail.
A small wheeled cart may help. Divide the load when possible. Test the route with an empty box. Avoid carrying heavy objects upstairs alone.
Stop for sharp pain, sudden pressure, catching, swelling, warmth, redness, or instability. New numbness, drainage, or weakness also needs medical advice.
Seek urgent care for severe pain, a visibly deformed joint, chest pain, breathing difficulty, or a painful, suddenly swollen calf.
Describe the object’s weight, your body position, and the exact symptom. Lower it gently and sit down. Photos may help, but examination matters more.
Can I lift heavy objects with orthopedic implants? The answer depends on your implant type, surgical history, healing progress, and overall health. Before lifting, obtain medical clearance from your orthopedic specialist and ask about specific weight limits, movement restrictions, and activities that may place stress on the implant or surrounding tissue. Do not assume that feeling strong means the joint is fully ready.
Safe lifting begins with preparing your body and environment: wear stable footwear, clear obstacles, warm up gently, and use assistance whenever possible. Keep the load close to your body, bend through your hips and knees, maintain a neutral spine, and lift smoothly without twisting or jerking. Increase weight gradually and stop if the task feels unstable or painful. Seek medical advice if you experience sharp or worsening pain, swelling, unusual clicking, numbness, weakness, redness, or reduced joint movement. Consistent follow-up and careful technique can help protect the implant and support long-term mobility.
